Walking Pad Setup & Maintenance Guide: Keep It Running Smoothly
Step-by-step guide to setting up your walking pad, maintaining the belt, adjusting desk ergonomics, and troubleshooting common issues.
| Product | Best For | Rating | Price | Action |
|---|---|---|---|---|
 KingSmith WalkingPad A1 Pro Tall users and natural gait comfort | Tall users and natural gait comfort | 4.7 | View on Amazon | |
 | Running and walking versatility | 4.0 | View on Amazon | |
 | Budget-conscious tall users | 4.2 | View on Amazon | |
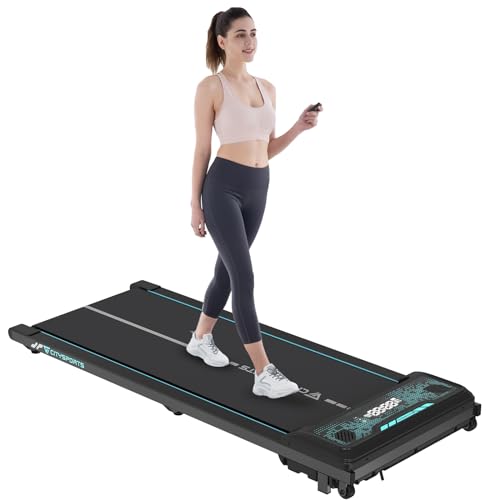 Citysports Under-Desk Treadmill Apartment dwellers and remote workers | Apartment dwellers and remote workers | 4.3 | View on Amazon |
Product prices and availability are accurate as of the date/time indicated and are subject to change. Any price displayed on this site at the time of purchase will govern the sale of the product. As an Amazon Associate, we earn from qualifying purchases.
Getting your walking pad out of the box is the easy part. Setting it up correctly and keeping it maintained over months of daily use is what separates a reliable walking station from a frustrating one. This guide covers everything from unboxing to long-term care, so your walking pad stays smooth, quiet, and safe for years.
How Do You Set Up a Walking Pad for the First Time?
Most walking pads arrive in a single box weighing between 45 and 75 pounds. Here is a step-by-step approach to getting started.
Step 1: Unbox on a clean, flat surface. Lay the box on its side and slide the walking pad out rather than lifting it vertically. This prevents the belt from catching on the packaging. Remove all foam inserts, plastic wrapping, and zip ties securing the power cord.
Step 2: Position it in your workspace. Place the walking pad where you plan to use it before plugging anything in. Make sure there is at least 3 feet of clearance behind the unit in case you need to step off quickly. If placing it under a desk, leave 1 to 2 inches of space on each side for airflow around the motor housing.
Step 3: Connect the power. Plug the power adapter into a grounded outlet. Avoid extension cords or power strips when possible, as walking pad motors can draw 3 to 5 amps and cheap power strips may not handle sustained loads. If you must use a power strip, choose one rated for at least 15 amps.
Step 4: Calibrate the remote and safety key. Most walking pads include a remote control and a magnetic safety key. Attach the safety key to the unit and pair the remote by following the manufacturer instructions, which typically involve holding a button for 3 to 5 seconds while the pad is in standby mode.
Step 5: Test at low speed. Start with the lowest speed setting, usually 0.5 mph, and walk for 2 to 3 minutes. Listen for any unusual scraping or grinding sounds. The belt should move smoothly without hesitation or jerking. This break-in period also lets the belt settle into its tracking position.
How Should You Set Up Desk Height for Under-Desk Walking?
Ergonomics matter more than most people realize when walking and working simultaneously. Poor desk height leads to shoulder tension, wrist strain, and neck pain that discourages daily use.
Elbow angle is your guide. Stand on the walking pad with it powered off. Your desk surface should be at a height where your elbows bend at approximately 90 degrees with your forearms parallel to the floor. For most people, this puts the desk surface between 38 and 44 inches from the ground, depending on the walking pad deck height and your own height.
Monitor position matters too. The top of your monitor should be at or slightly below eye level. Since you are standing on an elevated surface (the walking pad deck adds 3 to 5 inches of height), you may need to raise your monitor higher than you would for seated work. A monitor arm or a simple riser gets the job done.
Keyboard and mouse placement. Keep your wrists in a neutral position. A keyboard tray mounted slightly below the desk surface helps maintain proper wrist alignment while walking. Avoid reaching forward for your mouse, as this pulls your shoulders forward and creates upper back strain over extended sessions.
How Do You Lubricate a Walking Pad Belt?
Belt lubrication is the single most important maintenance task for any walking pad. Proper lubrication reduces friction, extends belt and motor life, lowers noise levels, and prevents the belt from sticking or jerking.
Lubrication schedule: Every 3 to 6 months under normal use, or after approximately 100 hours of walking time. If you walk an hour a day, 5 days a week, that comes to roughly every 4 to 5 months.
How to apply lubricant:
- Turn off the walking pad and unplug it from the wall.
- Lift one side of the belt from the center of the deck. You should be able to slide your hand between the belt and the deck surface.
- Apply a thin line of 100 percent silicone treadmill lubricant down the center of the deck, starting about 8 inches from the front and extending to about 8 inches from the rear.
- Use roughly 1 to 1.5 tablespoons of lubricant per application. More is not better -- excess lubricant migrates to the edges and attracts dust.
- Repeat on the other side.
- Plug the unit back in and run it at a slow speed (1.0 mph) for 2 minutes with nobody on it. This distributes the lubricant evenly across the deck.
- Walk on it normally for 2 to 3 minutes to finish spreading the lubricant.
Never use WD-40, petroleum-based oils, cooking sprays, or household lubricants on your walking pad. These products degrade the belt material and can damage the deck surface. Only use 100 percent silicone lubricant formulated for treadmills.
How Do You Adjust Belt Alignment and Tension?
Over weeks of use, the walking belt can drift slightly to one side or develop too much slack. Both issues are normal and easy to fix.
Belt alignment: Look at the gap between the belt edge and the frame on both sides. If the belt has shifted left, use the included Allen wrench to turn the left rear roller bolt clockwise by a quarter turn. If it has shifted right, adjust the right side. Make small adjustments and run the belt at low speed for 30 seconds between each quarter turn to observe the result.
Belt tension: With the unit powered off, grasp the belt at its center point and lift. You should be able to raise it 2 to 3 inches off the deck. If the belt lifts more than 3 inches, it is too loose and may slip during use. Tighten both rear roller bolts equally by a quarter turn each. If the belt does not lift at all or feels drum-tight, loosen both bolts equally. An overly tight belt strains the motor and wears the belt faster.
How Should You Clean a Walking Pad?
Regular cleaning prevents dust buildup that shortens motor life and keeps the walking surface hygienic.
After each use: Wipe the belt surface with a dry or slightly damp microfiber cloth to remove sweat and dust. Never spray cleaning products directly onto the belt.
Weekly: Vacuum or sweep around the base of the walking pad where dust and debris accumulate. Pay special attention to the motor intake vents, usually located on the front of the unit.
Monthly: Unplug the unit and wipe down the entire frame, display panel, and underside with a slightly damp cloth. Check the gap between the belt edges and the frame for hair, thread, or debris that may have worked its way into the mechanism.
How Do You Troubleshoot Common Walking Pad Problems?
Belt stops or hesitates mid-walk. Usually caused by insufficient lubrication or an overly tight belt. Lubricate the deck and check belt tension. If the issue persists, the motor may be overheating. Let it cool for 30 minutes and try again.
Belt drifts to one side. Adjust alignment using the rear roller bolts as described above. If the belt continues drifting after multiple adjustments, the deck surface may be unevenly worn and professional service is recommended.
Unusual grinding or scraping noise. This often signals belt-to-deck friction from dried lubricant or a foreign object caught under the belt edge. Unplug the unit, lift the belt, inspect for debris, and apply fresh lubricant.
Remote control stops responding. Replace the battery first. If that does not help, re-pair the remote by holding the pairing button for 5 seconds with the walking pad in standby mode. Most remotes use CR2032 coin cell batteries.
Error codes on the display. Consult your specific model's manual. The most common codes indicate motor overheating (let it cool for 30 minutes), belt over-speed (reduce speed setting), or safety key disconnection (reattach the magnetic safety key).
Consistent maintenance takes less than 15 minutes per month and can double the lifespan of your walking pad. A well-maintained unit runs quieter, walks smoother, and saves you from costly repairs or premature replacement.
Recommended Walking Pads
Looking for a walking pad to set up? Here are our top picks for 2026:
| Walking Pad | Belt Size ↕ | Max Speed ↕ | Weight Limit ↕ | Rating ↑ | Price | Action |
|---|---|---|---|---|---|---|
GoPlus 2-in-1 Folding Treadmill GoPlus | 16" x 40" | 7.5 mph | 265 lbs | 4/5 (7,066) | Check price on Amazon → | View on Amazon |
WalkingPad R2 Walk&Run 2-in-1 Treadmill WalkingPad | 17" x 47" | 7.5 mph | 240 lbs | 4.1/5 (460) | Check price on Amazon → | View on Amazon |
KingSmith WalkingPad P1 KingSmith | 15.75" x 47" | 3.7 mph | 220 lbs | 4.2/5 (1,311) | Check price on Amazon → | View on Amazon |
WALKINGPAD Z1 WalkingPad | 17.3" x 47.2" | 3.7 mph | 242 lbs | 4.2/5 (342) | Check price on Amazon → | View on Amazon |
WALKINGPAD C2 Folding Walking Pad WalkingPad | 15.75" x 47.2" | 3.73 mph | 220 lbs | 4.2/5 (0) | Check price on Amazon → | View on Amazon |
LifeSpan TX6-GlowUp Under Desk Treadmill LifeSpan | 20" x 48" | 6 mph | 400 lbs | 4.2/5 (95) | Check price on Amazon → | View on Amazon |
DeerRun 4-in-1 Walking Pad DeerRun | 16.53" x 44.09" | 7.5 mph | 300 lbs | 4.3/5 (213) | Check price on Amazon → | View on Amazon |
WalkingPad X21 Double-Fold Treadmill WalkingPad | 18.1" x 47.6" | 7.5 mph | 220 lbs | 4.4/5 (282) | Check price on Amazon → | View on Amazon |